File Handlers
A File Handler specifies the storage platform where Document Archive will store the attachments.
The following File Handlers are available:
The selected File Handler does not change the behaviour nor the features of Document Archive.
We recommend to set up your File Handler in collaboration with you IT administrator/department.
Let us delve into the specifications and differences between Microsoft SharePoint, Azure FileShare, and Azure Blob Storage:
-
Microsoft SharePoint
-
Data Types: SharePoint Online is designed to store structured data such as documents, spreadsheets, and presentations.
-
Scalability: While SharePoint is scalable, it is not as flexible as Azure Blob Storage.
-
File Versioning: SharePoint provides robust file versioning capabilities.
-
Access and Collaboration: SharePoint is ideal for collaboration, allowing users to share access to files and collaborate seamlessly.
-
User Interface (UI): SharePoint offers a user-friendly UI for managing files.
-
Cost: SharePoint can be costlier due to its readily available UI and features.
-
-
Azure FileShare
-
Structured Data: Azure FileShare is a managed file system, suitable for structured data storage.
-
Access: It is best for scenarios where you need to mount and access files directly.
-
Security: You can lock down Azure Storage more easily, making it suitable for archival purposes.
-
Programmatic Access: Requires either programmatic access or using the Azure Portal.
-
UI: The Azure Portal UI is not as user-friendly as SharePoint.
-
Cost: Generally cost-effective but lacks built-in UI features.
-
-
Azure Blob Storage
- Unstructured Data: Azure Blob Storage is designed for unstructured data such as images, videos, and audio files.
- Scalability: Highly scalable and suitable for large-scale data storage.
- Programmatic Access: Ideal for accessing data programmatically through applications.
- UI: Requires programmatic access or Azure Portal usage.
- File Versioning: Not as robust as SharePoint.
- Cost: Cost-effective for long-term storage, especially when you provide your own UI wrapper.
Abstract
Summarized:
- SharePoint is great for collaboration, structured data, and file versioning.
- Azure FileShare is straightforward for mounting and accessing files.
- Azure Blob Storage excels in scalability and programmatic access.
Info
It is not possible yet to transfer files automatically between the file handlers after switching the filer handler after the implementation. This needs to be performed manually if needed.
Please choose your file handler wisely.
Microsoft SharePoint
Microsoft SharePoint is a central hub for teams to store, organise, and share documents and information. It offers features such as document libraries, lists, and workflows, enabling efficient collaboration and process automation. It integrates seamlessly with other Microsoft tools, providing a unified experience.
SharePoint ensures data protection with robust security measures, access controls, and encryption. Organisations utilise it for various purposes, including intranet portals, Project Management, and knowledge sharing. Its user-friendly interface and customisation options make it a versatile solution for enhancing the team's productivity1.
If you would like to set up SharePoint as your File Handler, please follow these steps:
1. Choose a Destination SharePoint Site and Drive
Either use an existing site and use a drive from that site to store your Document Archive files, or create a new site and/or drive.
For more information on how to create a new SharePoint site, please see: Create a Site in SharePoint
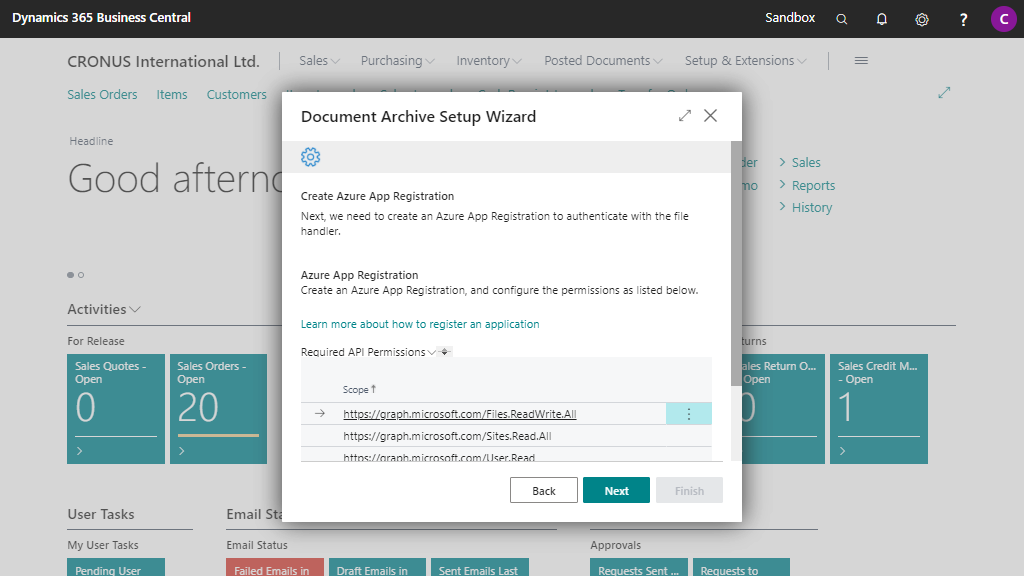
2. Create an Azure App Registration
Choose which authentication/permissions type you would like to use, and create an Azure App Registration accordingly. You can choose to set up authentication via the following two authentication/permissions types:
-
Delegated (Authorization Code)
Authorization is based on the permissions for the SharePoint drive of the user account that is used in Business Central.
Note
Note that you can only use delegated permissions if the SharePoint drive and Business Central environment are in the same Microsoft Entra tenant.
It also means that a Delegated Admin user (from another Microsoft Entra tenant) will not be able to download or upload files from/to the SharePoint drive using Document Archive.
-
Application (Client Credentials) (Recommended)
Authorization is based on the permissions of the Azure App Registration and not on the permissions of the user account used in Business Central.
In the overview below you will find the (recommended) settings to use for the authentication/permissions types:
| Permissions Type | Delegated | Application |
|---|---|---|
| App Registration Permissions | Microsoft Graph: - File.ReadWrite.All (Delegated) - Sites.Read.All (Delegated) - User.Read (Delegated) |
Microsoft Graph: - File.ReadWrite.All (Application) - Sites.Read.All (Application) Grant admin consent |
| OAuth 2.0 Grant Type to Use | Authorization Code | Client Credentials |
| OAuth 2.0 Scopes | https://graph.microsoft.com/Files.ReadWrite.All https://graph.microsoft.com/Sites.Read.All https://graph.microsoft.com/User.Read |
https://graph.microsoft.com/.default |
| Redirect URI | Web: https://businesscentral.dynamics.com/OAuthLanding.htm |
Web: https://businesscentral.dynamics.com/OAuthLanding.htm |
| Authorization URL | https://login.microsoftonline.com/<Entra Tenant ID>/oauth2/v2.0/authorize |
https://login.microsoftonline.com/<Entra Tenant ID>/oauth2/v2.0/authorize |
| Token URL | https://login.microsoftonline.com/<Entra Tenant ID>/oauth2/v2.0/token |
https://login.microsoftonline.com/<Entra Tenant ID>/oauth2/v2.0/token |
To assist you with the Azure App Registration, please use the following documentation from Microsoft: Quickstart: Register an app in the Microsoft identity platform | Microsoft Docs.
Please, also check our how-to video on apportunix.com: Azure App Registration How to video - Apportunix.
3. Edit the OAuth 2.0 Configuration
Edit and complete the OAuth 2.0 configuration by clicking on the Edit button.
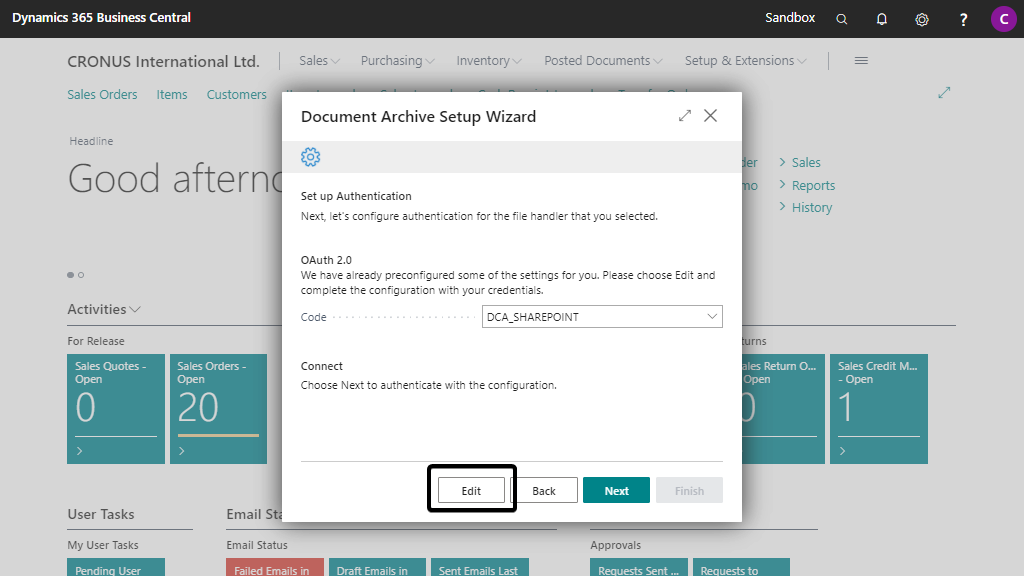
By default, the (automatically generated) OAuth 2.0 Application record will have Authorization Code as the Grant Type which corresponds with Delegated permissions, but you can change this based on your preferred authentication/permissions type.
Caution
Do not forget to use the Grant admin consent for "Tenant" button to grant admin consent for the Azure App Registration permissions.
Note
You can also use the Password Credentials flow/grant type to use a specific account for the authentication and authorization, but we advise against using this flow/grant type for production scenarios.
The next step describes how to complete the OAuth 2.0 Configuration in more detail.
4. Complete the OAuth 2.0 Configuration
Perform the following steps in the next page and click on Next:
a. The fields Code and Description are filled in with a default value, but can be changed manually.
b. Fill in the Application / Client ID and the Client Secret which are provided during the Azure App Registration of step 5.
Danger
Please make absolutely sure to keep track of when your Client Secret expires.
Let your IT administrator/department keep track of this so that the client secret can be replaced with a new one, before it expires.

c. Grant Type is set up with Authorization Code as default and as preferred grant type.
This can be changed manually to your preferences.
Note
If you would like to use Grant Type = Client Credentials instead, then please use https://graph.microsoft.com/.default as the only Scope record.
Please consult with your IT administrator/department which Grant Type to use for your company.
d. Authorization URL and Access Token URL are filled in automatically based on your current Microsoft Entra tenant, but can be changed if necessary.
e. After entering all settings, please invoke the Request Access Token action to see if the authentication is successful.
Caution
There is an access token caching bug in the OAuth 2.0 platform implementation in Microsoft Dynamics 365 Business Central. This bug has been reported to Microsoft.
Please note that even though retrieving an access token might be successful, due to this caching bug you might get an old access token that provides insufficient permissions. This can be a confusing issue when you have just changed the permissions on your Azure App Registration and try to retrieve a new access token from Business Central.
You must wait at least 1 hour for the cached token to expire before you get a new access token with the appropriate permissions.
f. Close the OAuth 2.0 Application card page by invoking the Close action at the bottom-right of the page.
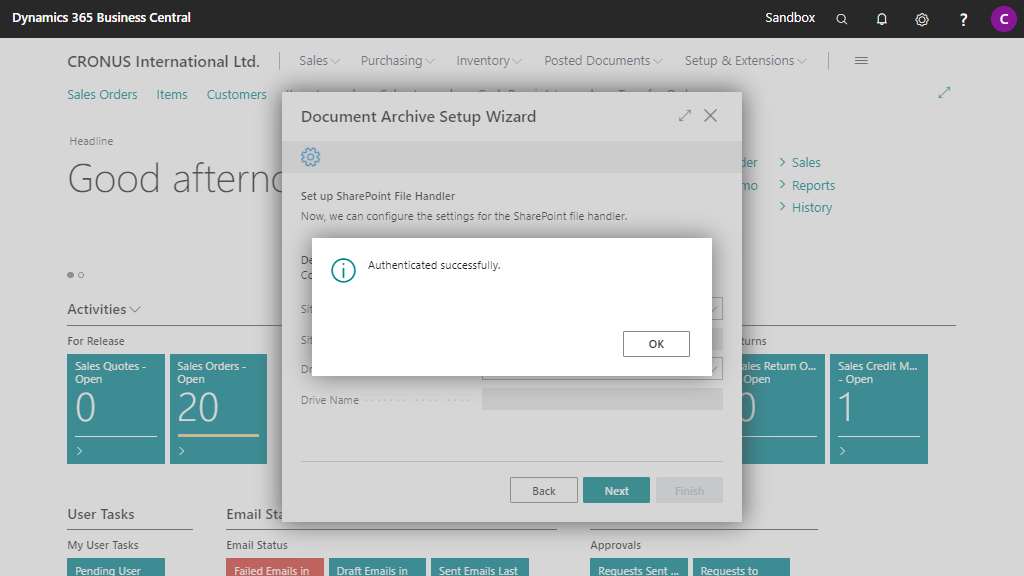
5. Authenticate OAuth 2.0 configuration
After clicking on Next, Document Archive will validate the connection and credentials that you set up and will provide a message when the authentication is successful.
Please fix the OAuth 2.0 Application if an error is raised by carefully reading the error message.
Close the message by clicking on OK.
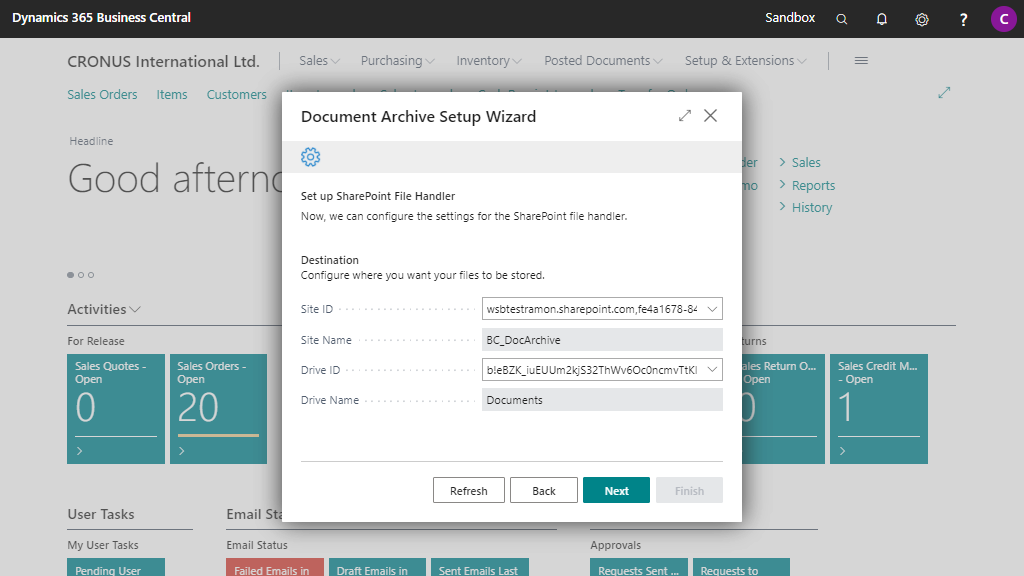
6. Confgure SharePoint File Handler
Fill in the Site ID and Drive ID of the preferred SharePoint site and drive combination. The options available are based on your Microsoft Entra tenant.
If you create a new site and drive in your Microsoft Entra tenant during this setup, you can refresh the available sites and drives by clicking the Refresh button.
Caution
If the Azure Application Registration uses Delegated Permissions and you are logged in as a delegated admin, then you might not be able to access the customer Microsoft Entra tenant's SharePoint Site IDs and Drive IDs.
Please log in with a customer Microsoft 365 account to complete the wizard.
Press Next to continue.
Microsoft Azure Blob Storage
Azure is a leading cloud computing platform offered by Microsoft. It provides various services for building, deploying, and managing applications and infrastructure. It allows organisations to scale resources on demand, ensuring optimal performance and cost efficiency. It offers robust security features, data encryption, and compliance certifications to protect sensitive information.
Azure supports various programming languages, frameworks, and tools, making it highly flexible and adaptable. Additionally, it integrates seamlessly with other Microsoft products and services. Overall, it empowers businesses with the scalability, reliability, and agility needed to drive innovation and digital transformation in the cloud1.
If you would like to use Azure Blob Storage as a File Handler, please follow these steps:
1. Create an Azure Storage Account
Create an Azure Storage Account via the Microsoft Azure Portal and then also generate an Access Key for the Azure Storage Account.
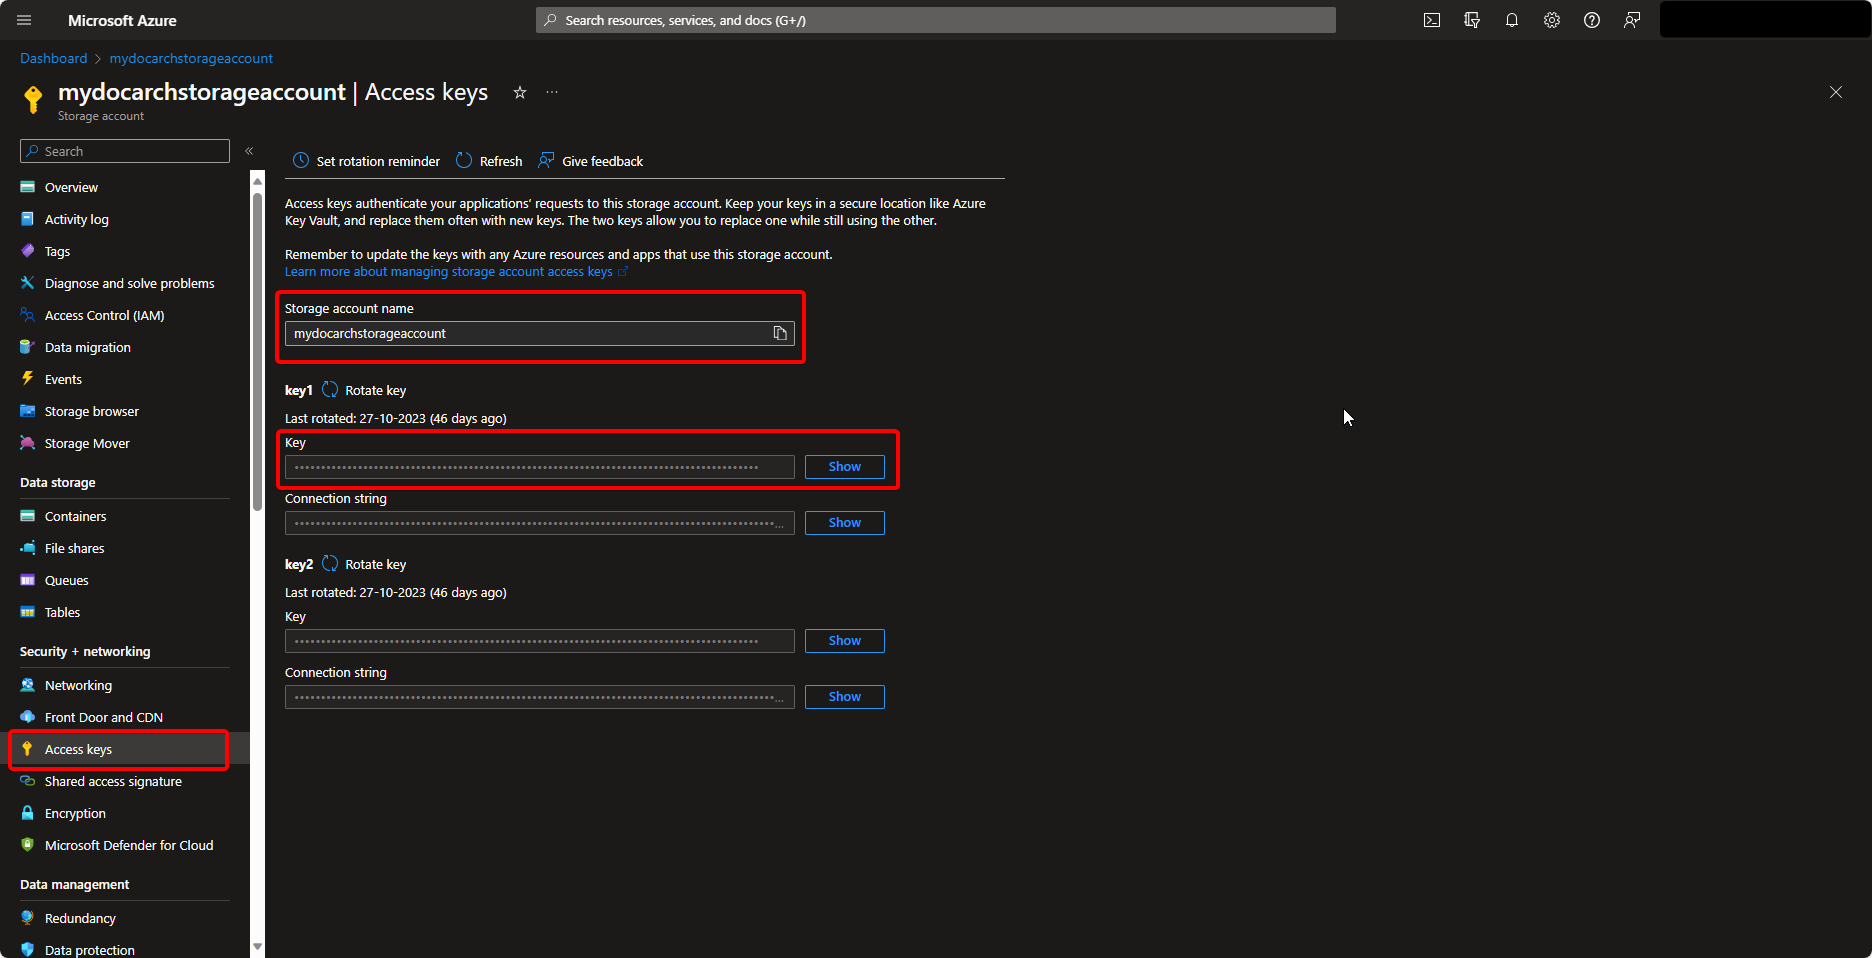
Note
Copy and save the Storage account name and Access Key from the Access keys tab for later use.
2. Create a Container in the Azure Storage Account
Create a container in the Azure Storage Account that you set up earlier.
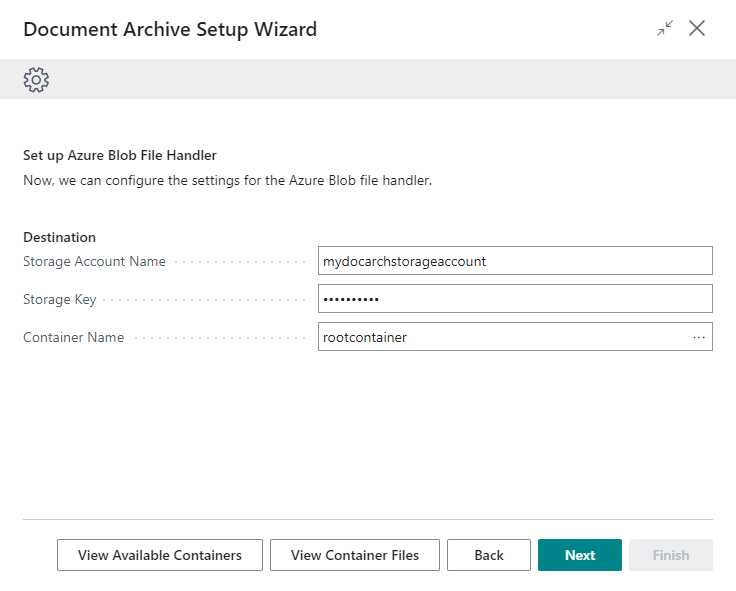
3. Confgure the Azure Blob File Handler
Fill in the Storage Account Name and Storage Key from step 1.
Afterwards choose the container from step 2 in the Container Name.
Press Next to continue.
Info
To use the option View Container Files you will need the Apportunix Doc. Arch. Manager permission set.
Microsoft Azure File Share
Azure Files offers fully managed file shares in the cloud that are accessible via the industry standard Server Message Block (SMB) protocol, Network File System (NFS) protocol, and Azure Files REST API. Azure file shares can be mounted concurrently by cloud or on-premises deployments. SMB Azure file shares are accessible from Windows, Linux, and macOS clients. NFS Azure file shares are accessible from Linux clients. Additionally, SMB Azure file shares can be cached on Windows servers with Azure File Sync for fast access near where the data is being used. 2.
If you would like to use Azure File Share as a File Handler, please follow these steps:
1. Create a Azure Storage Account
Create a Azure Storage Account via the Microsoft Azure Portal.
Note
Copy and save the Storage Account Name for later use.
2. Create an Azure File Share
Create an Azure File Share inside the storage account that you created earlier.

Note
Copy and save the file share name for later use.
3. Create a Shared Access Signature
Create a Shared Access Signature to grant access to the Azure File Share. See "Delegate access with shared access signature" for detailed instructions.
The minimum permissions required for setting up the Azure File Share file handler are as follows:
- Allowed services: File
- Allowed resource types: Service, Container and Object
- Allow permissions: Read, Write, Delete, List, Create
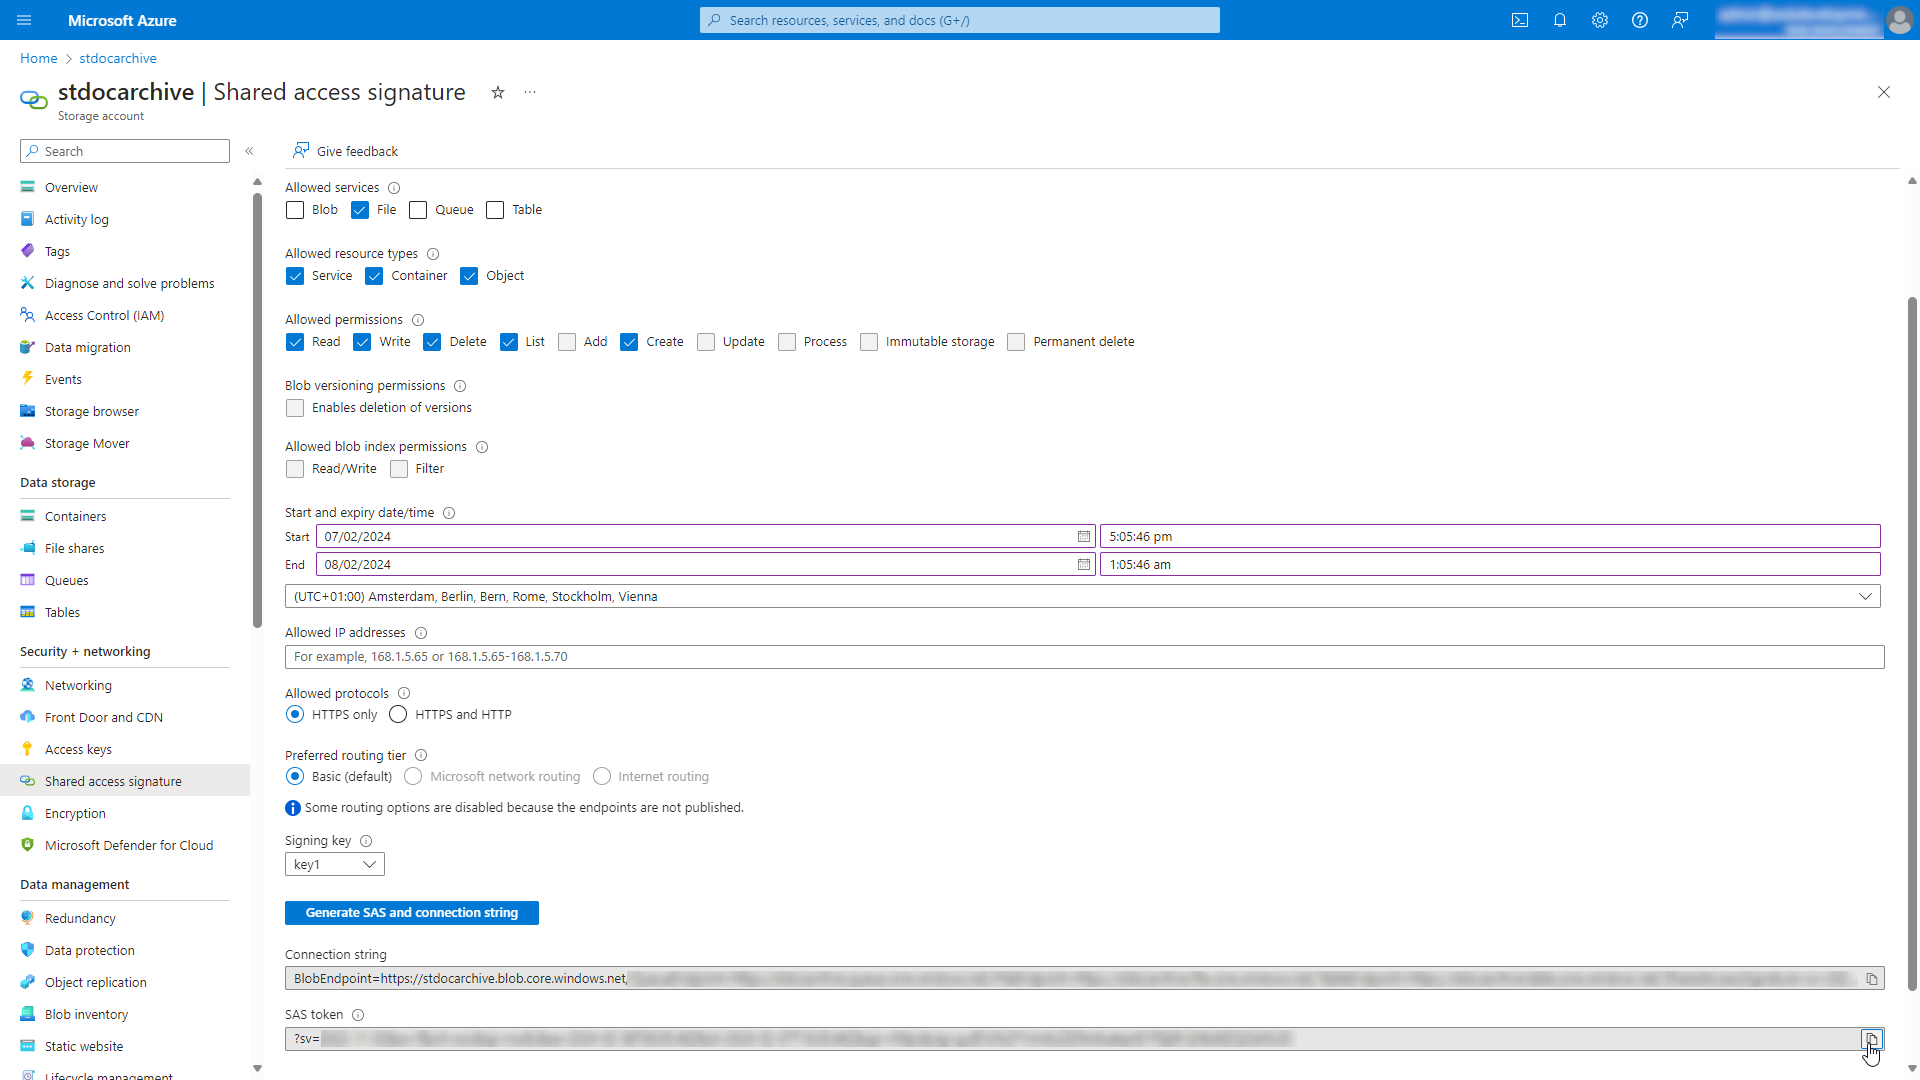
Important
Generate the Shared Access Signature and copy the SAS token for later use
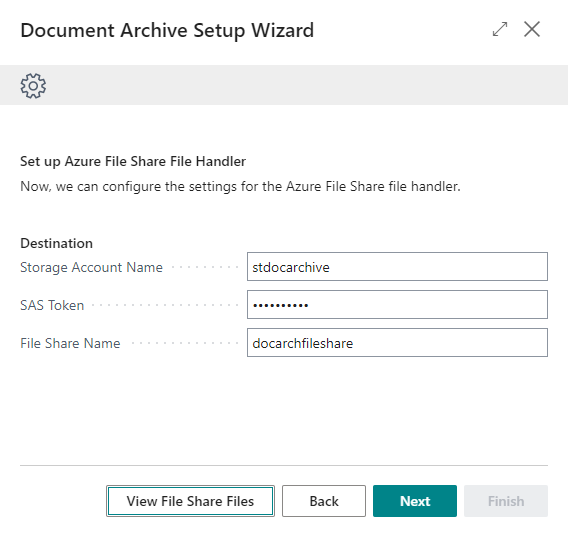
4. Confgure the Azure File Share Handler
Fill in the Storage Account Name from step 1, the File Share Name from step 2 and the the SAS Token from step 3.
Press Next to continue.
Info
To use the option View File Shares you will need the Apportunix Doc. Arch. Manager permission set.
-
Source: The Knowledge Academy - Microsoft Azure vs SharePoint: Which Platform is Better? ↩↩
-
Source: Microsoft Learn - Introduction to Azure Files | Microsoft Learn ↩